Sunday, September 29, 2013

Quick Photo gallery of the 2013 Fall Junk Bonanza


 Too tired for words tonight, so here are some fun photos of some of the sights from the  2013 Fall Junk Bonanza...So....
 
It's a wild ride


More later

Tuesday, September 24, 2013

How to pack for Flea Market Travel

I think I just about have flea market traveling down to a science, but I continue to improve on the process. So I thought I'd share a bit of what I've learned with all of you. 

Planning
My first tip is get an airline credit card and an app for your smart phone, from your preferred airline.

 I usually travel via American so I have the advantage card, and the app on my phone.

The advantage card give me miles from all my purchases (I was recently able to book a flight to LA for only $5) and a free checked bag(this is important!).
 The app gets me onto my flight with relative ease.
 It allows me to both check in and get my boarding pass all from home up to 24 hrs before my flight.

Android


Packing

Since I can check a bag for free each way, I have my large bag and I place my smaller bag inside it.  Smaller bag has all the essentals. and larger bag gets any overflow and packing materials I might want to bring along. Notice the little folded up bag in the front. It has wheels and will be for shopping while at the Bonanza and then simply folds up for the return trip home.


Then I have this wonderful bag for a carry on. It holds lap top, snacks, phone, money etc. All the essentials when traveling, and fits under the seat in front of me. So there will be no hoisting of bags into the overhead bins for me, at least for the flight out. Carry a small crossbody purse for shopping and flying.


This is what I have when I arrive at the airport. I'll check the large bag with the sky cap, show him my AA credit card, and boarding pass on my phone,  give him a $5 tip and be on my way strait to the security line.


At the Airport
Once in security I have "priority access" because of my Airline credit card, so I wait in the shorter line, and hopefully zip right through.


Returning Home
When it's time to come home, I have an empty bag, to pack full of stuff .
Remember to know the measurements of your bag before you head out shopping.
 Don't buy anything that won't fit or you'll be sorry.

When packing, empty things should be filled with smaller things. Pack it like a game of tetris. You'd be surprised how much you can get into that bag. Used bags, boxes, paper etc can be used as packing materials. Clothes can be wrapped around things to cushion etc.  Split purchases and clothes between the 2 bags to distribute the weight (check with airline for weight limit). Be sure your carry on has no forbidden items, liquids, or sharp objects. Save those for the checked bag.

Returning to airport, check you large bag and carry your smaller bag and your little, under the seat bag, through security.  Stow your small purse inside one of those bags for boarding and you are on your way.
Be prepared to have your luggage looked at (junkers know why;).

A few more tips.
I always bring food with me. I am a flight jinx and am always getting delayed, Severely delayed, even overnight delayed. So having protein bars, snacks and water is very handy in those situations.

For black luggage, tie something colorful on it so that you'll know it's yours, and someone else won't grab it by mistake. Here's a photo of everything I got into my luggage from my last trip, using this method.
Even the candle holder on the right.  :)
Bon Voyage'
 

Saturday, September 21, 2013

Junk Bonanza Here I Come

On Wednesday I'm off to Minnesota for the one and only


I look forward to this trip every year. There is stuff just for junkers to wear Fabulous Displays

Great project ideas
Lots of mass quantities
People having fun


Displays to die for

And of course, Friends!

LMK if you are going, Maybe we'll bump into each other.
To keep up with my adventures click the Facebook button above and then like my Facebook page for regular reports and updates.

Thursday, September 19, 2013

Ki Nassauer on America Now, How to make a great coffee table from vintage finds.

AmericaNowNews.com

Ki is now the Vintage Expert for America Now. See her first segment here.

Friday, September 13, 2013

In love with Mid Century Lamps

If you had told me, a few years ago, that I would like anything Mid century, I think I would have died laughing.

But....
I got the bug.

To be sure, I stay away from anything that reminds me of the mid century that I grew up with, but I am loving some of the fun mid century designs that are making a come back these days.

Especially the colors, the modern sleek lines, and the sense of nostalgia.

I am currently on the hunt for a lamp, I want color and an atomic look, but it needs to fit in with my current decor which is remnants of traditional, prim, eclectic, junk repurpose, rustic.  Got that!!!!

So here are some of the fun lamp designs I ran across in my searches.
  Many are way way out of my price range, but I had to share.


Delightfull.Stanley Lamp

Love this one, colors etc. But it's not a floor lamp and...well... the price is way out reach.


Design metal floor lamp SINATRA FLOOR Delightfull  

Here is a floor version, Not as thrilled with the colors on this one

Still too expensive


Floor lamp


Floor lamp (clipped to polyvore.com) This is a fun and truly retro one that I would LOOOOOVE to have. It's perfect in every way.  No price found, but isn't it divine.


This is a Jonathan Adler Version, still out of my price range.

  Duke-Delightfull 

Duke by Delightfull

A little different shade shape, and I like the blue


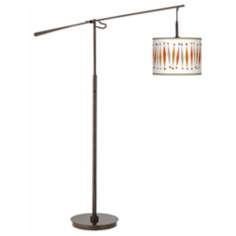
Tremble Giclee Glow Bronze Balance Arm Floor Lamp 

Then I ran across a huge collection of lamps with fabulous retro shades on Lamps Plus 

I was thinking of getting this one from Home Depot and taking some spray paint to it. I'll let you know how that goes if I decide to do it. I really would prefer to find genuine vintage.


I did find one,  just this Friday the 13th (lucky day). Is it a table, is it a magazine rack, is it a lamp? Answer Yes to all.


Monday, September 9, 2013

Towel Bar from Frames, How to


If you follow my facebook you recently saw this towel bar project I posted on Sunday.
 I promised a how-to and here it is


Driving down the road one day, after my bathroom was painted, but not yet decorated, I contemplated what to use for towel display.  I could put up the old towel bars that I had removed before painting, but that is no fun What could I use that was a re-purpose, I wondered.  Everything I thought of was much too cottag-y or crafty.  How about wood from old frames I thought, and then it hit me.  Why not just use the whole frame!  But how to mount it so it had space behind for the towels?  The solution quickly came to me. Use other frames as spacers and make a frame collage towel bar.  

Note the most frequently asked question I get about this project is...
"what about wet towels and the wood".  The answer is
I have a separate hook for wet towels, this is for dry towels, decorative and hand towels. It's also in a rarely used bathroom. If you were going to hang wet towels, regularly, I would suggest a non wood option.


Frames are one of my "must get" items whenever I see them at garage sales and they are cheap.  So I have quite a stash of them and have used them for many projects, some you can see here.  

I gathered several frames I had in various sizes. You'll need one large one and a couple of smaller ones and the various other sizes as you'd like.  You'll want the largest one to be long enough to accommodate your towels.
First I laid out the design on the floor. Then I traced the frames on craft paper and  cut out pieces to do a mock up on the wall.  I carefully arranged, leveled and measured so that when I recruited Hubby to do the drilling we would not have to revisit the placement.
A note about getting hubbs help.  I am perfectly capable of doing this myself. But I'm impatient and not detail oriented. I'd be drilling holes all over the place with no real plan of action. Getting frustrated and damaging my walls in the process.  Hubby is an engineer and always has great ideas about how to make my projects work better. So in an effort to limit the frustrations, I asked him for his help, which he is always glad to give.
Of course all my papers fell off the wall because I used a weak tape.  LOL  Anywhoo, It was pretty easy to slap them back up there so Hubby knew exactly what I was thinking.  First he figured out where he would be drilling to allow for maximum strength.  First up are the 2 spacer frames, which I painted a Yellow color.

Line it up for one last look, then drill through both the frame paper and wall. 

Remove the craft paper and insert a plastic anchor into the hole.
Replace frame and check for accuracy. Then decide where the other holes will go and drill into the frame.  Now an important part of drilling through the frame is to countersink the screws.  We did this by partially drilling with a larger bit down about 1/8", just enough for the screw to sink below the front of the frame. 
 Hubby's tip, Switch the drill to go backwards, so you don't chip up the front of the frame.  I told you he was cleaver!

After securing both spacer frames in their proper places, it was time for the larger frame which will hold the towels. Make sure your frame is strong on the side that will be the lower rung. You don't want it falling apart.

Use a level at each part of this process to make sure everything is strait.
Drill through both frames, again countersinking your screws, secure in 4 places.  
We were careful when hanging the yellow frames, to hide some of our screws underneath where the larger frame would overlap, so that  they are hidden. 
The paper mockups helped with this process.
When finished fill in the exposed holes with wall joint compound, or hole filler. You may need to go over them a few times, as it shrinks as it drys.

 Wipe smooth after each application with a wet cloth to blend into the curves of the frame.
 Once dry and contoured, paint over the holes to blend with frame colors. 
Hang your towels and you are finished.  I added smaller frames to give it more punch. I hung those in the usual way.  You could add lots of frames or just a minimal amount. It's all up to you.

There are also some special flush wall anchors you can purchase and use, but I thought this was easier and more secure.  
These frames are so strong they are not going anywhere.
Blog Widget by LinkWithin