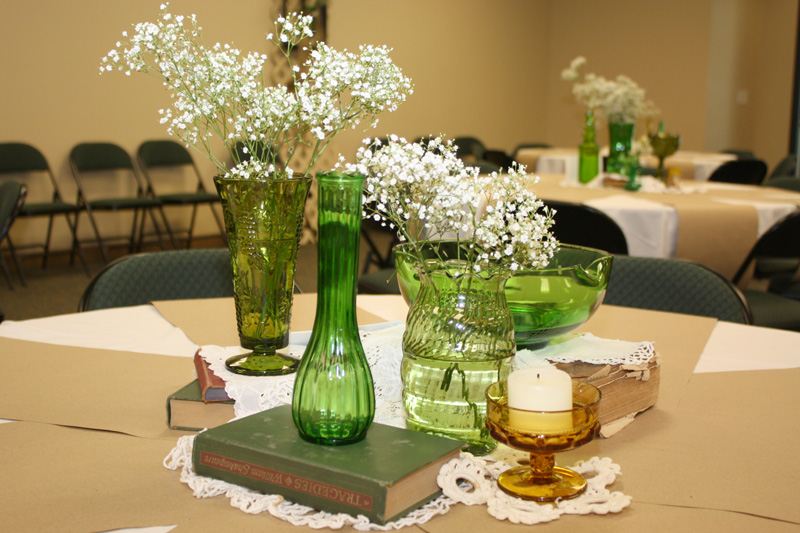
I have a hard time calling this stuff Junk, it just looks too pretty. But most of it was thrifted, repurposed, vintage items. From brooches, to doilies, to chippy garden stuff. It was so fun to put together, and I'm so happy to share it with you.
 After much bugging by his Mom (me), Allen got the edited pics to us today. Here are the wedding decorations, through his eye.
The entry table
The typewriter was found in my grandparent's house and has been used by my Dad and all my uncles when they were in school. The paper inside was printed in a large old fashioned type font, on my computer at home. The Arch, Candles Lit
 The draping
The Bride and groom have a moment before the "before wedding" pics. 
 Flower Girl coloring during the reception.
Remember I put craft paper on all the tables and plenty of crayons.
We saved all the artwork for the B&G.
 The piano above where there was a toast and a first dance.
The lattice and frame hide a fire extinguisher.I had no idea this area would be there, and we threw some decorations together on the fly. Extra rose peddles covered the top of the piano, a few green glass vases (we had plenty) filled with babies breath, and the frame and lattice.
Below is a vignette I did, the chalkboard says "honeymoon fund". There are 2 green glass bowls inside the suitcase. I used books as lifts and filled it in with flowers and doilies.
They collected quite a bit :)
The tossing bouquet sits beside the suitcase.  The vignette below was also a last minute idea ( I had a stash of stuff I wanted to maybe use but did not know how it would be used. This is on the other end of the "honeymoon fund" table. Between the suit case and the area below, was blank space for gifts. By the end of the reception it was overflowing. The letterpress blocks say "gifts" "cards" "love" &"xoxoxo". Inside the goblets are the vials of bubbles.
  The bride put together a coffee bar with all the flavorings anyone would want. She used my chalkboard tags. The tags had a hole on one end. When she came to me to figure out a way to hide the holes,I just happened to have a bag full of creamy buttons. We bedded each tag into the buttons, covering the hole.
  I want to show you the cake table. This was such a great idea. The MOB baked all these pound cakes and they displayed them on all this clear classware on different levels.
  The cake topper had it's own glass totem of honor.
  Below is not Allen's photo, but shows the complete table.
It was a great look, and the cakes were so good, served with Strawberries. Yum, I get hungry every time I look at the pics. I take no credit for the cake table, that was the MOB, the Bride and a friend's idea. I love it!!!!!
If you take away any idea from these posts, this one should be it.  You can see more on Allen's blog here.Lessons learned:
Since this was the first wedding I've ever decorated for (not really even my own). I knew that there would be a lot to learn. Fortunately most of it came out perfect, but I did learn a few things. Some I figured out beforehand, some after.
So if you are thinking of taking on a project like this you might want to read my Lessons Learned below.
#1How you think a project will work, usually has to be altered. It seemed that with each project, I had an idea in my head about how it would work. Then when I went to do it, I had to alter it because it didn't work as I had imagined.
#2Mock ups are important. Don't wait till decorating day to figure something out. Try it at home first.
#3 Do as much of the work before hand as possible.
#4 Don't light the candles too early
#5 Multiple lighters in multiple places are a must!
As well as multiple scissors, and pliers.
#6 Instead of trying to coordinate it all myself, next time I'll have teams, each with a leader in charge of certain areas.
#7Accept any and all help offered.
#9Don't sweat the small stuff, nobody will notice.
#10 Things will go wrong, try to roll with the punches.
#11Have fun, enjoy the process.
Now Back to Junkin


 I've found some great things this week and one of them was some time.
 as dresssed-up business card holders
 I think I'm hanging on to these for awhile. Love the colors they used on the old maps. I love how they look in my work room.


 Va Voom!!!