Showing posts with label fabric. Show all posts

Wednesday, April 1, 2015

Barkcloth projects


 I love vintage Barkcloth and I especially love the retro designs.

 Used mostly for curtains, you can still find large panels of barkcloth at estate sales and antique stores. I recently picked up 3 nice sized panels and began looking for projects for this lovely pattern.  Here are a few, common and unusual projects I tried, or found on line.

 Dress up an old dress form, with some groovy barkcloth scraps.


Laminate   an old school chair that has seen better days. 
See before and after photos at the end of this post.


Use mod podge to decoupage some old trays. For instructions look here.

 
Cover some shoes, See here for instructions


I keep my collection on display using vintage wooden hangers


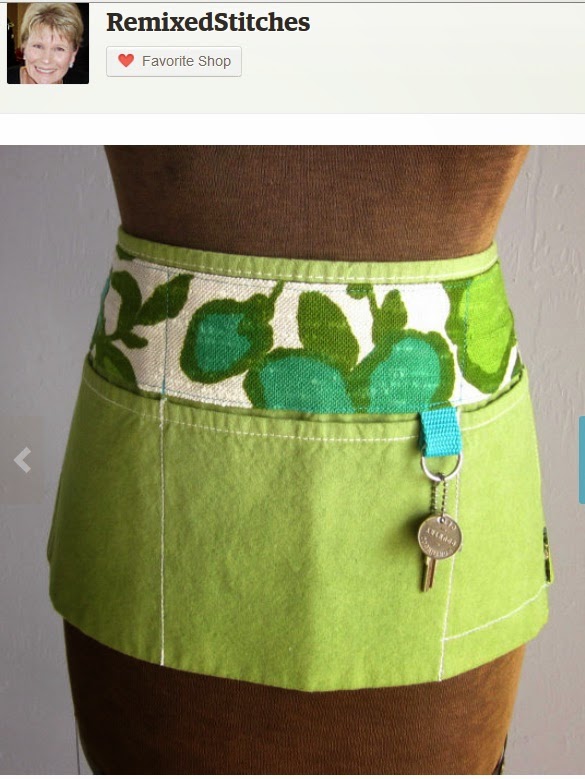
My friend Karla makes some fun Flea Market Aprons out of vintage fabrics, including barkcloth. You can view her store here.
https://www.etsy.com/shop/RemixedStitches


 found on Etsy are some amazing and beautiful pillows and pillow covers.

https://www.etsy.com/shop/SouthendDesign?ref=search_shop_redirect


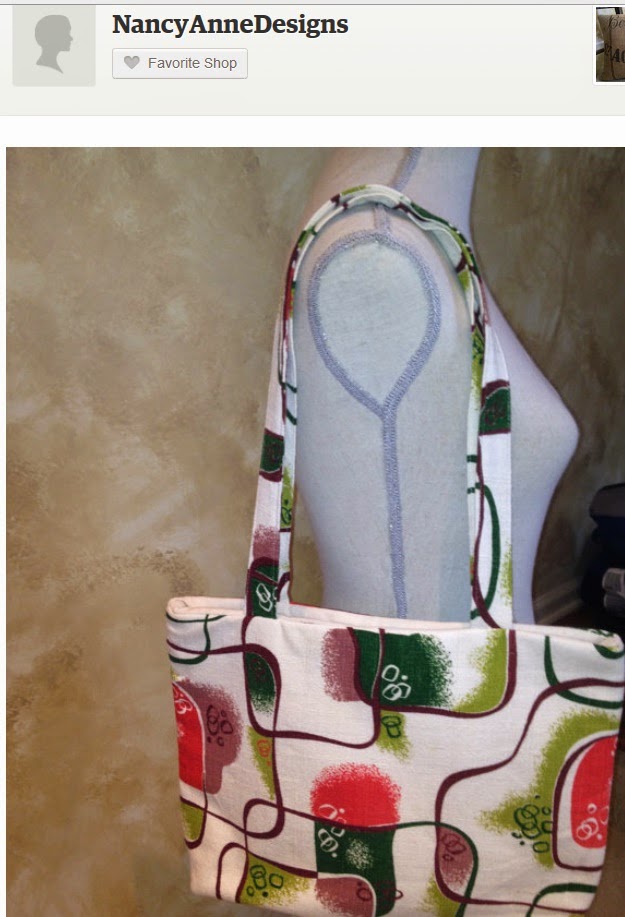
And a lot of totes and bags using old barkcloth. See more here
https://www.etsy.com/shop/NancyAnneDesigns


I saw this pillow in Minnesota at Hunt & Gather.

Of course you can always make curtains, cover chairs etc.

 So keep your eye out for this nubby fabric with fun designs for your next project. And if the price is good, don't hesitate to purchase.

Chair Project

This old chair was in poor shape. first I used wood glue to secure the layers of plywood as much as possible.
I sprayed it with spray adhesive, pressed the fabric down. Painted with several layers of Mod Podge, Using the same technique I use with my trays. See details here

Saturday, October 4, 2014

Fun Fabric Tray project


One of the items on my do not buy list is trays, but when I saw these old fiberglass trays I knew I had found what I've been looking for and  at just $3 each I had to get them. One of my first projects once home was the one in the back of my mind, just waiting for the right trays. It came out so nice I had to share it.
Start by painting the top of the tray white with spray paint, and let dry.
I put masking tape around the edge, to keep the paint only on the top of the tray. The reason for this is so the color(s) on the tray do not show through the fabric.


Once Dry, remove the tape and either apply spray adhesive or mod podge to the tray. Then align your fabric, and starting from the center begin to press it down moving outward,  avoid air bubbles as you go. Pay special attention to the curving edges, and pressing down on the top lip to get good contact. Paint over it again with mod podge on top of the fabric this time.  Allow the excess fabric to simply spill over and set aside to dry overnight.
Once Dry, use a sharp knife or razor to carefully cut away the excess fabric aligning it with the edge of the tray. Get as close as you can. Use an up and down motion to break the threads.
Then apply a second coat of mod podge, You can do this as many times as you'd like. I stopped at the 2nd coat. Allow it to dry overnight.

Note: The tray will probably not feel smooth to the touch. Fabric fibers tend to stand up when wet and they dry this way.  The tray will have a rough feel, but I don't mind this.  I was afraid to try and sand paper for fear of making it dirty.  Different fabrics may react differently.
The last step is to apply a coat of clear acrylic spray paint.  I do this because the mod podge will remain sticky and items you set on the tray will tend to stick to it.  The spray acrylic helps with this problem.

This process can be used for many projects.  How about clip boards, or luggage etc?  Use any fabric you like, old scarves, tea towels, clothing etc all work great.

Blog Widget by LinkWithin